
A DIY chuck box is a portable camp kitchen cabinet that stays packed between trips. Open the door, set the stove on top or beside it, and cook without unpacking a pile of bins. The name comes from the chuckwagon: in 1866, rancher Charles Goodnight fitted a rear compartment onto a wagon so trail cooks could reach utensils, spices, and a drop-down work surface without tearing the load apart.
Most published plans fail for the same reason. They start with a cut list instead of the stove, the vehicle, and the number of people you actually cook for. Size the box around those three constraints and a single sheet of half-inch plywood is usually enough.
What a chuck box has to do at camp
A useful chuck box does four jobs at once.
It holds the non-perishable kitchen: plates, cups, utensils, a pot or Dutch oven, spices, oil, a lighter, dish soap, and a towel. Fresh food and ice stay in a cooler. It gives you a stable place for a two-burner stove, either on the closed lid or on a shelf sized for that stove. It opens into a prep surface, usually a front door held level by chain or by the open side doors. And it latches so nothing migrates while the vehicle is moving.
That is different from a folding camp kitchen. A camp kitchen gives more counter space and often a sink, but you still pack the gear separately and set the station up at every site. A chuck box trades counter area for the ability to leave camp with the kitchen already loaded. Scout troops have used patrol versions of this idea for decades; car campers and overlanders use the same logic for weekend trips.
Measure the gear and the vehicle before you buy wood
The box that looks right in a photo is the wrong box if the stove does not fit with the fuel bottle attached, or if the loaded unit will not clear the hatch.
Lay the stove on the floor with the fuel bottle or propane cylinder in its normal cooking position. Measure length, width, and the height of the windscreen when it is open. A Coleman-style two-burner is often about 18 inches wide, 12 inches deep, and under 6 inches tall closed, but the bottle adds length. Write that footprint down. It sets the minimum interior of the stove bay.
Then stand the tallest item you insist on carrying upright — percolator, oil bottle, nested pot — and note that height. Shelf spacing comes from that number, not from a generic plan.
Finally, measure the cargo opening and the flat floor where the box will ride. A common finished size that still fits most SUVs is roughly 22 to 24 inches wide, 14 to 16 inches deep, and 16 to 21 inches high. One widely shared plywood build lands at about 16.5 inches high, 22.5 inches wide, and 14 inches deep, and weighs around 35 pounds once loaded. Larger boxes with fold-out side counters exist; they are better for a truck bed than for a hatch that you load alone.
Work-surface height matters if the box sits on the ground. Scout Life’s patrol-box guidance puts the swing-down surface at 30 to 34 inches, which is why some designs use removable legs. If the box lives on a picnic table or tailgate, skip the legs and save the weight.
Three builds that match different trips
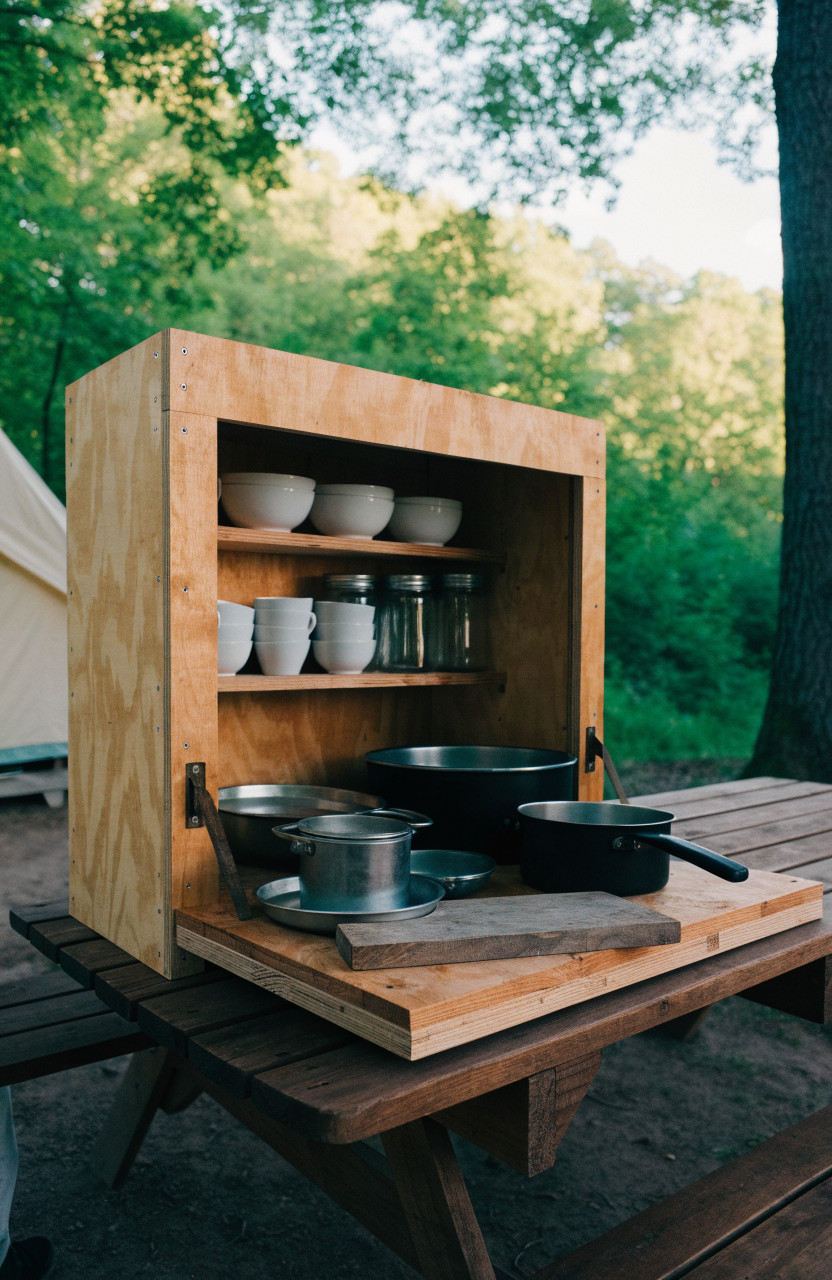
Simple plywood cabinet. One 4-by-8-foot sheet of half-inch plywood, a hinged front that drops into a counter, two or three shelves, and a latch. No drawers. This is the right first build. Published plans from Filson’s workshop collaboration and from REI both start here: glue and screw the carcase, hang the door, add handles. You can have a hardware store rip the sheet if you do not own a saw.
Door-supported side counters. The front doors open and become the supports for narrow side boards. You gain prep space beside the stove. The joinery is fussier, and the box gets wider. Worth it only if you cook for four or more and have the cargo room.
No-build stand-ins. An IKEA cabinet turned on its side, with the door chained so it cannot swing past horizontal, works for driveway camping. A front-opening toolbox or an ActionPacker with dividers is lighter and more water-resistant. Neither should have a hot stove set directly on plastic. Use them as the packed kitchen and cook on a table.
Plastic wins on weight and weather. Wood wins on a rigid prep surface, custom compartments, and the ability to hang utensils on the inside of the door. Many Scout troops keep cookware in a wooden chuck box and bulk gear in plastic totes for that reason.
Materials and hardware that hold up
Half-inch plywood is the usual choice because three-quarter-inch adds weight without much benefit on a box this size. Birch or another hardwood plywood is more stable than construction-grade softwood plywood. Exterior-grade or MDO (the sign-board plywood some builders use) resists moisture better than interior cabinet plywood. Avoid MDF. It swells and falls apart after one wet weekend.
Seal every face and every cut edge before the first trip. Bare plywood edges drink water. Exterior paint, spar urethane, or shellac-plus-varnish all work; the important part is full coverage, including the inside.
Hardware that actually gets used:
- Wood glue on every joint, plus screws. Predrill near edges so half-inch plywood does not split.
- A piano hinge or two butt hinges for the drop front. Screws must be shorter than the panel thickness.
- Chain or wire and eye screws to hold the door level. A free-swinging door is a prep surface that collapses.
- A positive latch, not a magnet alone. Magnets are fine as a second closure.
- Two side handles rated for the loaded weight. Pocket-hole screws or through-screws into solid blocks beat thin cabinet pulls for carrying.
A basic build — one sheet of plywood, hinges, latch, handles, glue, and finish — commonly lands in the $80 to $200 range, depending on plywood grade and whether the store cuts the sheet.
Seal every plywood edge, since camp moisture and morning dew swell unprotected wood until joints open and doors stick. For the work surface, skip a plastic lid that can sag or overheat under a stove, and use wood, a metal top, or a separate table instead.
Build sequence for a simple box
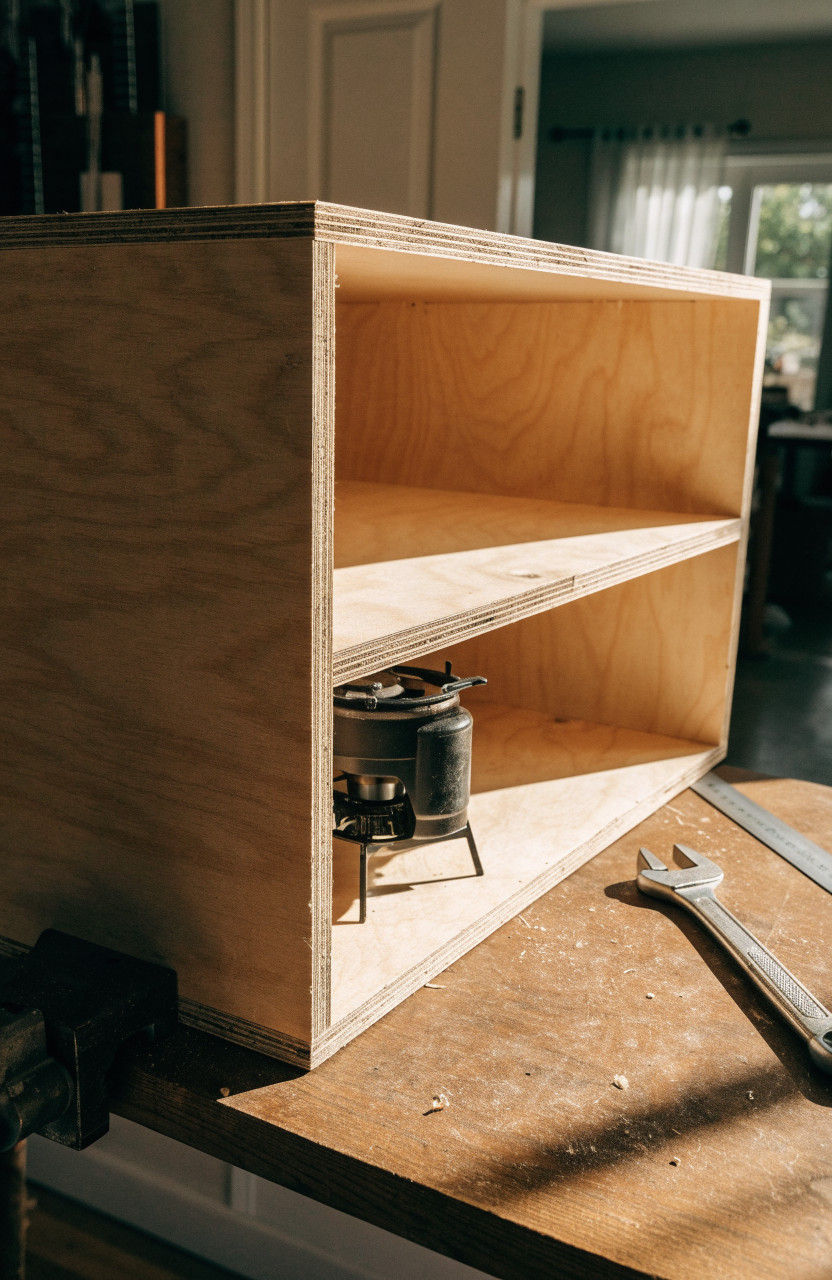
- Cut or have cut the sides, bottom, back, top, shelves, and door from the sheet. Label the show face of each piece.
- Dry-fit the carcase around the stove footprint. Adjust shelf height before glue.
- Glue and screw the sides to the back, then the bottom. Work with the box on its back so joints stay square.
- Install shelves and any vertical dividers. A lip on the front of each shelf keeps gear from sliding out when the door opens.
- Hang the door. Fit the chain so the door stops level, not slightly downhill.
- Add handles and the latch. Pick the box up empty and shake it. Anything that rattles needs a block, a strap, or a smaller compartment.
- Sand sharp edges, then finish all surfaces. Let the finish cure before you load food-contact items.
Customize after the box is square. Add a hook strip for a spatula, a narrow spice bay, or a slot for a cutting board. Removing a shelf is easier than trying to force a Dutch oven into a space designed for mugs.
What belongs inside, and what does not
Pack for the meals you repeat, not for a catalog kitchen.
A two-person box often holds nested bowls or plates, two mugs, a spatula and a spoon, a small cutting board, salt, pepper, oil in a leakproof bottle, coffee kit, lighter, biodegradable soap, and a scrubber. A two-quart Dutch oven or one pot lives in the large bay. The stove sits on top or in its own bay if the lid is the counter.
Leave these out: a full knife block, glass jars, anything that leaks, and more than one spare fuel container. Fuel belongs upright, capped, and in a compartment that cannot tip onto food. Follow the canister maker’s storage rules, and do not leave pressurized cylinders in a closed box in a hot car longer than the trip requires.
A dish rag tucked behind metal plates cuts road rattle. That small packing detail shows up in almost every chuck box that has survived a season of dirt roads.
Keep raw meat and last week’s leftovers out of the box, though spices and oil are fine. The chuck box is the dry kitchen and the cooler is the cold one, so perishable food never shares space with the soap.
When a bin or a bought box is the better call
Build if you already have the tools, you camp often enough to justify a dedicated cabinet, and you want compartments that match one stove. Buy or adapt if you camp a few times a year. A front-opening tote with cheap organizers does the “stays packed” job for less money and less weight. Commercial aluminum chuck boxes exist in the few-hundred-dollar range and skip the finishing work; they are worth comparing once you know the interior size you need.
The decision is mostly about how often you load the vehicle. A box you can grab on Friday and unload on Sunday earns its shelf space. A box that needs a second person and a clear driveway does not.
Questions people ask before they cut plywood
Can one sheet of plywood do the whole box? Yes for a simple cabinet. Half-inch plywood, one 4-by-8 sheet, is the standard starting point in the REI and Filson-style plans. Drawers, legs, and side counters usually need extra stock.
How much weight should you plan for? Empty plywood boxes are often in the high teens to mid-20s in pounds. Loaded with a stove and cookware, 30 to 40 pounds is common. If you cannot lift that into the vehicle, shrink the box or switch to plastic.
Does the stove go inside or on top? Either works. Inside protects the stove and frees the lid as a counter. On top saves interior space and is simpler to build. Measure both ways before you commit.
Is a chuck box safe for Scout or group camping? Yes, with the same rules as any camp stove: stable ground, fuel stored correctly, and clearance from tents. The box itself is only storage and a work surface. Legs should splay outward so an open, loaded box does not tip.
What finish is safe near food? Fully cured exterior paint or a food-contact-safe oil on the counter is the usual approach. Keep raw meat and cutting boards off an unfinished surface, and do not store food against wet paint.