Write down the order you cook in, from prep to heat to seasoning to serving to washing, before buying or building anything. The chuck box ideas below are built around that sequence, because a kitchen that unpacks in cooking order sets up in minutes instead of turning into a rummage through bins.
Layout, packing logic and small upgrades keep gear from rattling, leaking or vanishing under a lid. Mix and match them. A $20 tote with good zones beats a $400 box packed at random.
What a Chuck Box Is For
A chuck box (also called a grub box or patrol box) is a single portable case for camp kitchen gear: stove or stove space, cookware, utensils, spices, plates, and cleanup supplies. When closed it travels as one unit. When opened it should present shelves, drawers, or cubbies instead of a pile.
It is not a cooler, a bear canister, or a full folding camp kitchen. Food that needs ice stays in a cooler. Scented leftovers and toiletries in bear country still need park-approved storage. A folding camp kitchen gives more counter space but usually requires unpacking. A chuck box wins on speed and consistency: pack once, leave it packed between trips.
Typical family-size boxes land around 24–36 inches wide, 15–20 inches tall, and 14–18 inches deep. Loaded weight often runs 40–80 pounds. Solo or couple kits can stay closer to 35 pounds if cookware is nested and cast iron is limited.
Decide Size and Weight Before You Buy or Build
Measure the stove with the fuel bottle or regulator attached, then add clearance for the lid to open. Measure the tallest bottle you want upright (oil, soap, percolator). Those two numbers set width, depth, and shelf height. Building first and hoping gear fits is the most common DIY failure.
Weight matters more than volume. If one person has to lift the box out of an SUV at every stop, keep the loaded target under what that person can carry comfortably on uneven ground. Split into two lighter modules if needed. A box that stays in the garage because it is too heavy is not organized. It is abandoned.
Layout Ideas That Match How You Cook
1. Assign four zones instead of random shelves
Give every item a zone that matches meal flow:
- Prep: knife, cutting board, bowls, colander, towels
- Cook: stove, lighter, pots, skillet, pot gripper
- Pantry: oil, salt, pepper, core spices, coffee kit
- Clean: collapsible tub, biodegradable soap, scrubber, drying space
When zones cross, you reach over a hot burner for the spatula. Keep oil and seasoning next to the cook zone so drips stay local.
2. Size the top bay to your actual stove
A two-burner Coleman-class stove is roughly 21 × 13 × 4 inches. Design or shop for an interior bay larger than that, with room for a windscreen and ignition tools. If the stove only fits without the fuel attached, you will fight the box every trip.
3. Keep the stove on top so cooking does not require unpacking
The fastest boxes leave the stove in its bay. Open the lid, hook up fuel, cook. Designs that bury the stove under pans force a full empty before coffee. If the stove is too tall for the lid, store it on top under a strap or in a separate slim tote and use the top bay as extra prep space.
4. Add a fold-down front as a prep table
A hinged front panel, supported by chain or a folding brace, becomes a cutting surface when picnic tables are dirty, slanted, or missing. Keep the panel shallow (about 2–2.5 inches) so it can hold a spice rack or utensil hooks without making the closed box too deep for a cargo area.
5. Keep perishable food out of the chuck box
The box should hold tools and shelf-stable pantry items. Meat, dairy, and leftovers belong in a cooler. Mixing them turns the chuck box into a smell magnet and a cleanup problem. In bear country, even “empty” spice jars and dirty dishes need a storage plan that matches local rules. The box itself is almost never a legal bear-resistant container.
Internal Organization Ideas
6. Nest cookware and bag the lids
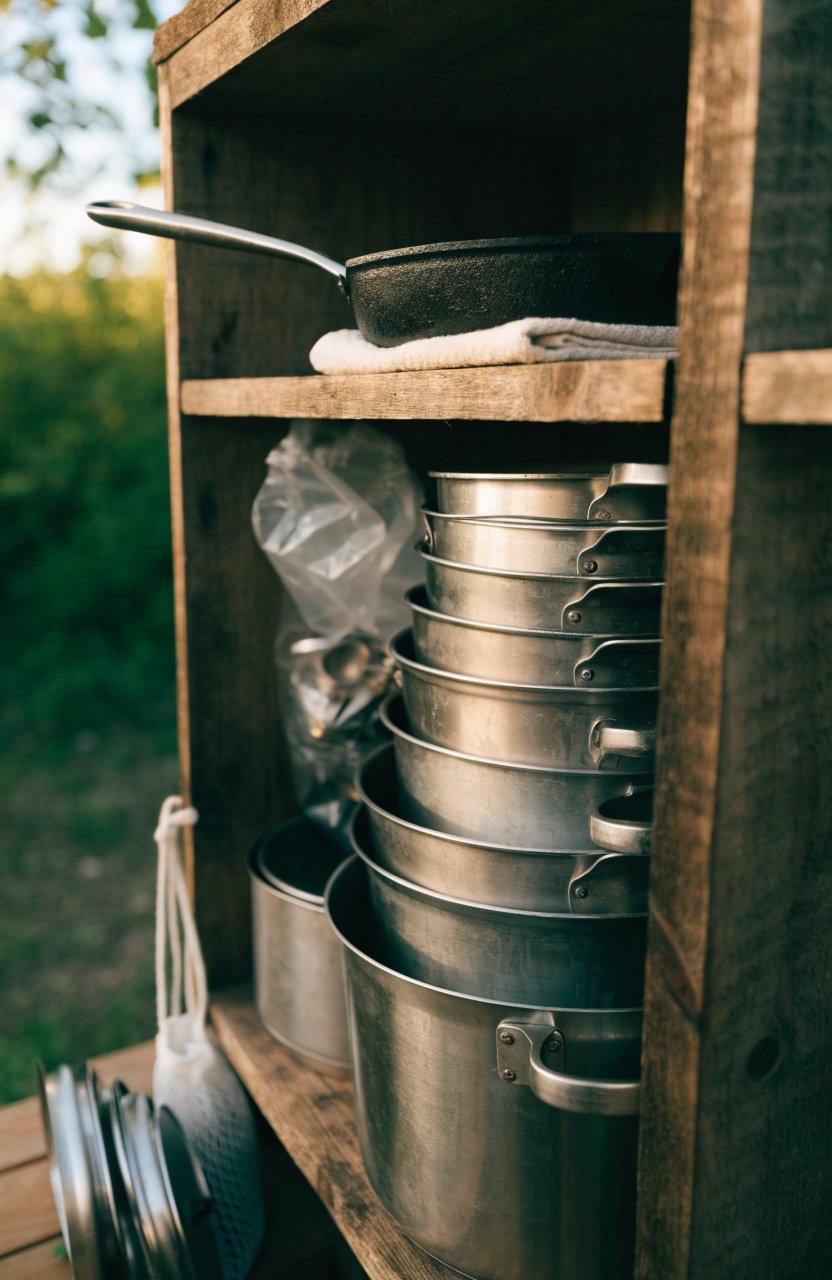
Stack pots by size. Slide the skillet on a shelf of its own or nest it with a towel between surfaces. Loose lids are what rattle and chip enamel. A single zip bag or mesh pouch for lids costs almost nothing and saves the hunt at dinner.
7. Replace a skinny utensil drawer with a latching box
Many commercial and DIY drawers are too shallow, too wide, or both. A clear latching shoebox or a stainless hotel pan holds knives in sheaths, spatulas, tongs, a can opener, and a lighter without dumping in transit. Scout groups often use the same approach in Action Packers because shared gear has to survive kids and gravel roads.
8. Build a dedicated spice and oil caddy
Do not line a shelf with glass bottles. Use a small plastic caddy or a divided bin that lifts out in one motion. Limit the kit to what you actually cook with: salt, pepper, oil, one heat spice, one savory mix, coffee or tea. Trip-specific extras go in a labeled bag and come out when the trip ends. That keeps the box from becoming a graveyard of half-used jars.
9. Use the doors as vertical storage
Hooks on the inside of cabinet doors hold spatulas, pot holders, and a collapsible paper-towel bar. A narrow door rack holds oil and condiments. Vertical storage is the cheapest way to keep table space free when the campsite only has one picnic table.
10. Pack labeled freezer-bag kits
One bag for coffee (filters, scoop, instant or grounds), one for dishes (soap, sponge, small towel), one for paper goods (foil, bags, trash liners). Kits let you restock at home without emptying the whole box. They also keep powder and liquid from coating every utensil after a rough road.
11. Line shelves and add lips
Plywood and plastic get slick. Shelf liner, a bead of silicone as a lip, or a 1-inch face board on each shelf stops bottles from walking forward when the lid opens. This is a five-dollar fix that prevents the “everything hits the dirt” moment.
12. Reserve a flat slot for boards, foil, and bags
The unused space under a drawer or behind a back panel is ideal for a cutting board, plates, foil boxes, and zip bags. Flat items steal less useful cube than they look. Putting them on end also keeps them from trapping moisture under cookware.
Setup and Cleanup Ideas
13. Give dishwashing its own corner
A collapsible basin, a small bottle of biodegradable soap, a scrub pad, and a quick-dry towel should live together. If the lid of the box is removable and watertight, some designs use it as a wash tub. Either way, dirty water needs a gray-water plan: strain food scraps, dump at a designated site, never in a creek.
14. Move the 1-pound propane cylinder off the cook surface
A side shelf or a hole in the side panel lets the cylinder hang outside the box while you cook. That frees the top, keeps the hose from kinking across the prep zone, and reduces heat near plastic organizers. Store spare fuel upright and away from the spice kit.
15. Add a small side door for packed-car access
When the box is already in the trunk, opening the main lid may be impossible. A latched side door—sometimes called an “oops” door in DIY builds—lets you grab the lighter, trash bags, or coffee kit without unloading the vehicle. Useful on road-trip days when you cook at a pullout.
16. Keep trash hardware with the kitchen
A bag ring, a roll of liners, and a small clip belong in the box, not “somewhere in the car.” Food scraps attract animals faster than dirty pans. Close the bag after every meal and store it with the cooler or in a locked vehicle overnight where required.
17. Separate fuel, fabric, and food smells
Stove fuel, oily rags, and open spices do not need to share a sealed pocket. Vent stove bays if you store a stove with residual fuel smell. Keep dish towels in a bag so they dry instead of souring. If you camp where rodents are bold, hard-sided bins beat fabric organizers for anything edible.
Box and Build Ideas
18. Build from one sheet of 1/2-inch plywood
REI, Filson, and several Scout-style plans use a single 4×8 sheet of 1/2-inch plywood, hinges, latches, and a lid prop. Empty weight stays reasonable; loaded weight depends on cookware. Seal every face and edge. Unsealed plywood swells after two wet weekends. Predrill so the plywood does not split. Add real handles—finger holes cut in thin ply fail when the box is full.
Best for: car campers who want custom shelf heights and do not mind yearly varnish.
19. Convert a Rubbermaid Action Packer with removable inserts
A 24- or 35-gallon Action Packer is cheap, lockable, and common in Scout troops. The box itself has no organization. Add a stove-sized top tray, a latching utensil box, a spice caddy, and a wire rack. Leave the inserts removable so you can wash the tote. This is the fastest path if you need a working kitchen this weekend.
20. Use milk crates, ammo cans, or a Pelican as modules
Two milk crates with a plywood shelf in each can hold nested pots in one and dishes plus spices in the other. Ammo cans work for a compact couple kit. A large hard case (Pelican-style) suits overlanders who want weather seals and the option to add a pegboard or LED strip. Modular systems are easier to lift and easier to restock than one giant cabinet.
21. Buy a roto-molded commercial box if you camp often
Molded plastic boxes such as the Yoke-style designs trade woodworking for weather resistance and lower empty weight. Common features include a stove bay, a pull-out utensil drawer, and a lid that doubles as a basin or extra bin. They cost more than plywood. They also skip warping, peeling finish, and the weekend spent cutting a cut list. Worth it if the box will live in a truck bed or see rain.
Aluminum slide-out kitchens are a different category: more counter space, more weight, more cost, and usually vehicle-mounted. Use those when the rig is the kitchen. Use a chuck box when you still cook on picnic tables and tailgates.
What to Stock Without Overpacking
A working two-to-four person kit usually includes:
- Two-burner stove or a compact alternative, plus spare fuel
- One pot, one skillet, one kettle (or a Dutch oven that covers two of those jobs)
- Plates, bowls, mugs, and utensils for the actual group size
- Knife in a sheath, cutting board, spatula, tongs, can opener
- Oil, salt, pepper, and a short spice list
- Coffee or tea kit
- Paper towels, foil, zip bags, trash liners
- Soap, sponge, collapsible basin, two towels
- Lighter and a backup igniter
Leave single-use gadgets at home until a trip proves you need them. A box that is “complete” for every possible meal is a box nobody wants to carry.
Where a Chuck Box Build Falls Short
Building before measuring. The stove with fuel attached is the constraint. Everything else flexes around it.
Making the box too heavy. Cast iron, full water jugs, and 3/4-inch plywood add up. Water and bulk food can travel separately.
Storing the stove under a pile of pans. You will skip hot breakfasts.
Leaving glass and open liquids uncontained. One leak seasons the entire interior.
Skipping a finish on wood. Moisture and heat destroy raw plywood faster than camp use does.
Treating the box as wildlife-proof. It is organization, not a certified bear can.
Never restocking at home. The system only stays fast if soap, fuel, and foil are topped off before the next departure.
Frequently Asked Questions
Is a chuck box better than a folding camp kitchen?
For frequent short trips, yes: gear stays packed and setup is faster. For a week-long base camp with a large group, a folding kitchen or a dedicated table often gives more prep space. Many people use both—a chuck box for tools and a table for workspace.
How big should a chuck box be for two people versus a family?
Two people can work from a compact box in the 20–30 liter range if cookware is nested. A family of four usually needs something closer to a large Action Packer or a 24-inch-wide plywood box. Fit the vehicle first. A box that does not leave room for sleeping gear is the wrong size.
Should the stove live inside the box?
If it fits with fuel attached and the lid still closes, inside is cleaner and faster. If it only fits by removing the stove every time you cook, store the stove separately and use the top of the box as a stand.
Can I leave food in the chuck box between trips?
Dry, sealed pantry items can stay if you check for pests and expired oil. Do not leave dirty dishes, open snacks, or anything that can spoil. At home, crack the lid so moisture does not sit in the wood or plastic.
Do I need to build one from wood?
No. An organized tote with inserts solves the same problem. Build wood if you want custom shelves and a fold-down table. Buy molded plastic if you want weather resistance and less maintenance. Improvise with crates if you want to test the system before spending a weekend in the shop.
A chuck box earns its space when the first meal at camp does not start with “where is the spatula.” Pick a container that fits the vehicle, organize it by cooking zones, and stop adding gear that does not have a job.