Wall tent camping is basecamp living, not backpacking. A wall tent is a rectangular canvas shelter with near-vertical side walls, a ridged roof, and a separate frame. That shape gives standing room to the edges, room for cots and gear, and—on most hunting and outfitter models—a stove jack so a small wood stove can heat the interior. It is the right shelter when you stay in one place for several nights, travel by vehicle, and want weather protection that a lightweight dome tent does not provide. It is the wrong shelter if you need to carry everything on your back.
What a wall tent is, and what it is not
A classic wall tent has straight side walls, often about 4 to 6 feet high, and a peaked roof that may reach 7 to 9 feet at the ridge. The canvas drapes over an external frame of aluminum, steel, or sometimes cut poles. Many designs include a sod cloth—a roughly 12-inch fabric flap along the bottom of the walls that tucks under the floor or is weighted outside to block drafts, insects, and ground moisture.
That layout is different from a dome tent, whose sloping walls steal floor space, and from a bell tent, which is round, usually uses a center pole, and trades rectangular furniture layout for faster setup. Cabin tents sold at big-box stores share the vertical-wall idea but are usually lighter synthetic fabric without a real stove system.
Two fabric families dominate:
- Cotton army duck, commonly 10 to 13 ounces per square yard, breathes, handles condensation better in cold weather, and can last many seasons if dried and stored correctly. New cotton often needs a first rain or a hose-down so the fibers swell and close needle holes.
- Synthetic or poly-blend canvas is often lighter for the same tear strength, sheds water with less seasoning, and is less prone to mildew if it gets packed damp. It can feel less breathable than untreated cotton.
Neither type is a backpacking tent. A mid-size wall tent with frame commonly weighs from roughly 50 pounds into the low hundreds, depending on size and materials. Transport is by car, truck, trailer, horse, or ATV.
When wall tent camping is the better choice
Choose a wall tent when the camp stays put.
It fits hunting camps, family car-camping trips of several nights, guide and outfitter basecamps, and cold-weather stays where a stove matters more than packed weight. Vertical walls mean a cot, a table, and duffel bags can sit against the sides without sliding into the middle. Canvas also damps wind noise and holds heat better than thin nylon once a stove is running.
Skip it when:
- The trip is a hike-in of more than a short carry from the vehicle.
- You move camp every day.
- The site is small, exposed, and regularly sees strong wind. Flat walls catch wind; a dome sheds it.
- You only need one or two nights of fair-weather shelter. A simpler cabin or dome tent sets up faster and costs less.
Price tracks size and grade. Entry setups can start around several hundred dollars; a quality mid-size tent with frame often lands in the roughly $1,000 to $2,500 range, and large outfitter packages with frame, floor, and stove can run well above that. A maintained canvas tent is commonly expected to last many years—manufacturers cite 20 years with disciplined care—so the cost is spread across seasons rather than one trip.
How wall tents compare with ordinary camping tents
| Decision point | Wall tent | Typical dome or light cabin tent |
|---|---|---|
| Usable floor | Nearly the full rectangle; standing room to the walls | Sloping walls shrink the edges |
| Heat | Stove jack on many models; holds heat | Rarely stove-safe; loses heat fast |
| Weight and bulk | Heavy; vehicle camp only | Light enough to backpack or toss in a trunk |
| Setup | Frame first, then canvas; longer the first time | Poles and clips; often under 15 minutes |
| Wind | Needs solid staking and a sheltered site | Aerodynamic shapes handle open wind better |
| Care | Must dry fully before storage | Synthetic is more forgiving of damp packing |
| Best trip | Multi-night basecamp, hunting, cold weather | Short trips, backpacking, exposed sites |
The tradeoff is simple: you buy space, durability, and heat, and you pay in weight, setup time, and storage discipline.
Size, frame, and features that actually matter
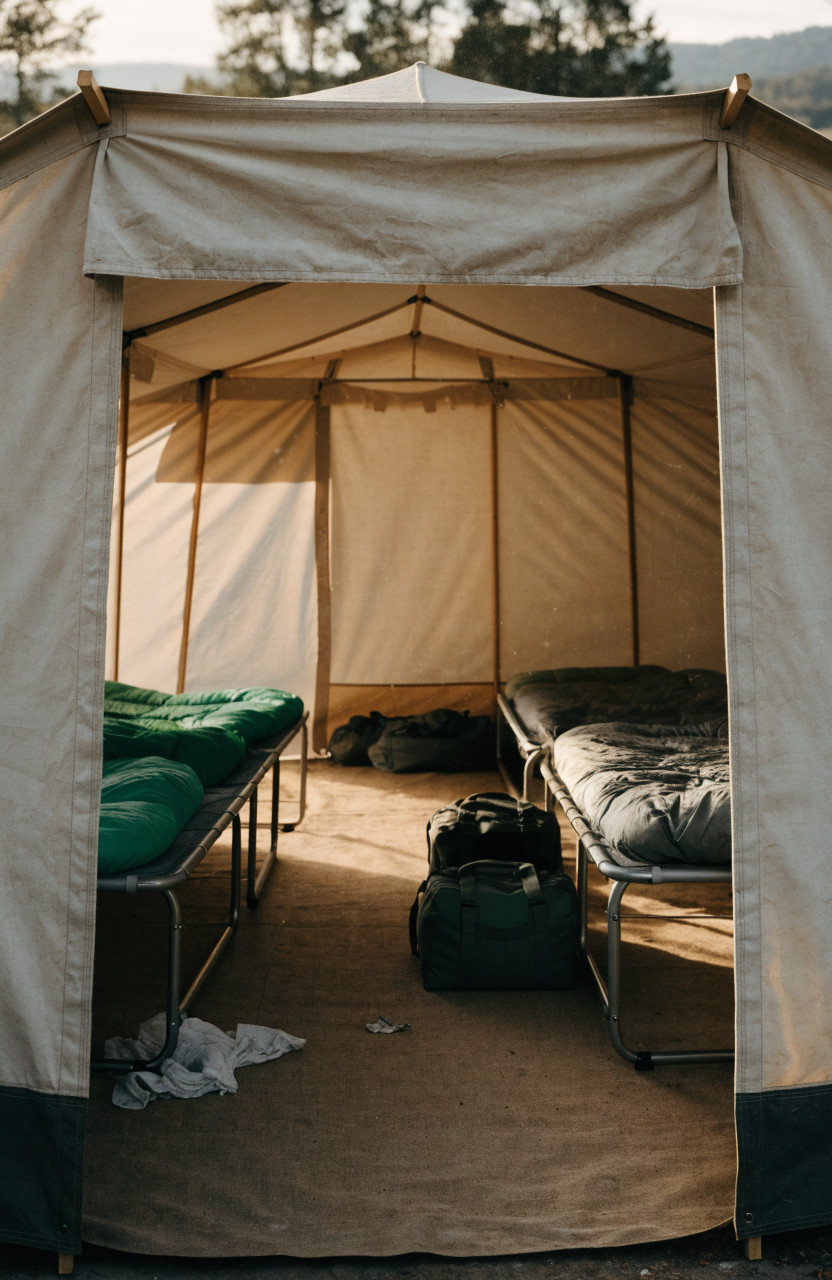
Floor area is less important than how you will sleep. A 10-by-12-foot tent is a tight couple’s or solo hunter’s camp once a stove and gear are inside. A 12-by-14 or 13-by-16 is a more realistic four-person layout with cots along the walls. Larger 14-by-16 and 16-by-20 tents are group and outfitter sizes and need more hands and a bigger site.
Check these details before buying:
- Sidewall height. Under about 5 feet, you still stoop at the edges. Taller walls cost weight and wind exposure.
- Stove jack. Match the jack diameter to the stovepipe, commonly 4 to 6 inches. A jack that is too large leaks cold air, rain, and sparks; one that is too small will not accept the pipe.
- Sod cloth and floor. A sod cloth without a floor is traditional and lighter. A separate vinyl or canvas floor is cleaner for longer stays. Stove cutouts or a fireproof mat belong under any wood stove.
- Frame. Aluminum is lighter and fine for most camps. Steel is tougher for semi-permanent sites. Some outfitter tents can be framed with cut lodgepole if the metal frame stays home.
- Doors and windows. A rear door helps cross-ventilation in warm weather. Mesh windows matter more than extra square footage if you camp in summer.
Stove clearance matters as much as floor area. A tent bought only for square footage may leave no spot where the stove can legally sit inside, so check the required clearances against the floor plan before settling on a size.
Pick the site before you unpack the frame
A wall tent amplifies a bad site. Look for ground that is level within a few degrees, not in a low pocket, and not in a dry wash or obvious drainage. Slight slope away from the tent is better than a dead-flat bowl that ponds in rain. Keep the site at least 200 feet from lakes and streams where rules require it, both for water quality and for flood margin.
Face the door away from the prevailing wind. If you will run a stove, put the stovepipe exit on the downwind side so sparks and smoke blow away from the canvas rather than across the roof. Avoid camping under dead trees or hanging limbs—the tent will be there long enough for a widowmaker to matter.
Clear rocks and sticks from the footprint. On established campgrounds, confirm the pad is large enough; many standard sites are sized for dome tents, not a 12-by-14 with guy lines.
A setup order that prevents the usual problems
First-time setup takes longer than the box suggests. Manufacturers report anything from about 10 to 30 minutes once you know the tent, to well over an hour on a first pitch of a larger model. Practice once at home.
A reliable sequence:
- Lay out canvas, frame parts, stakes, and guy lines. Confirm the stove jack and door orientation before anything is standing.
- Build the roof frame. A common method is to assemble the ridge and rafters with legs on one side only, so the ridge sits low enough to drape the canvas without a ladder.
- Drape the canvas, align doors and the stove jack, then raise the second set of legs and square the frame.
- Tuck the sod cloth under the legs before you lay a floor. Doing this after the floor is down means lifting everything again, and a gap at the base is where drafts and bugs enter.
- Stake the door corners first to square the tent, then work around the perimeter. Drive stakes at an angle away from the tent and tension guy lines so the canvas is taut without straining seams.
- Add a rain fly if the model uses one, especially for long stays and UV exposure.
One person can pitch a smaller wall tent. Larger outfitter tents are a two-person job in any wind.
Heating a wall tent with a wood stove
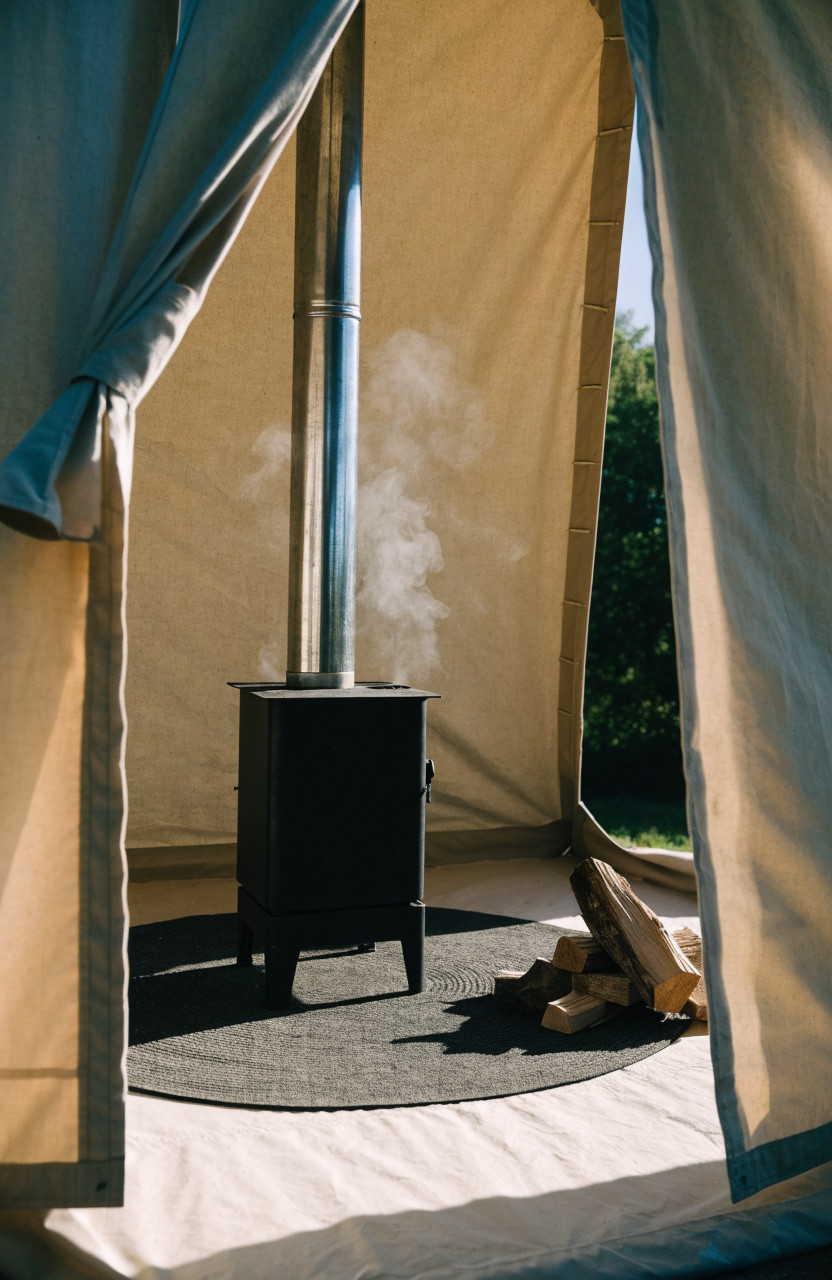
The stove is the reason many people buy a wall tent, and it is also the main hazard.
Place the stove on a non-combustible mat, with the body at least about 3 feet from canvas walls and well clear of bedding, clothing, and fuel. Some makers suggest 20 to 30 inches as a minimum perimeter; more clearance is safer, and a heat shield on the near wall adds margin. Run the pipe as straight as the jack allows. A vertical pipe through a roof jack usually drafts better than a long sidewall run. Guy the pipe so wind cannot lift it out of the jack overnight.
Match the jack to the pipe diameter. Keep a vent or door cracked for fresh air whenever the stove is burning, and use a battery carbon monoxide alarm. Do not leave a lit stove unattended, and do not burn it overnight in a fully closed tent. Wet or oversized wood smolders, makes creosote, and pushes smoke back inside; small, dry splits and a warm flue before you load the firebox fix most draft problems.
Size the stove to the tent. Too small and the walls stay cold; too large and you overheat the space and the nearby canvas. Outfitter guidance generally scales firebox size with tent volume rather than with a single “best” model.
A wood stove should never run without a CO alarm in the tent and an open vent. Both belong in place before the first fire is lit, not after the canvas has already warmed up.
How to live in the tent for more than a night
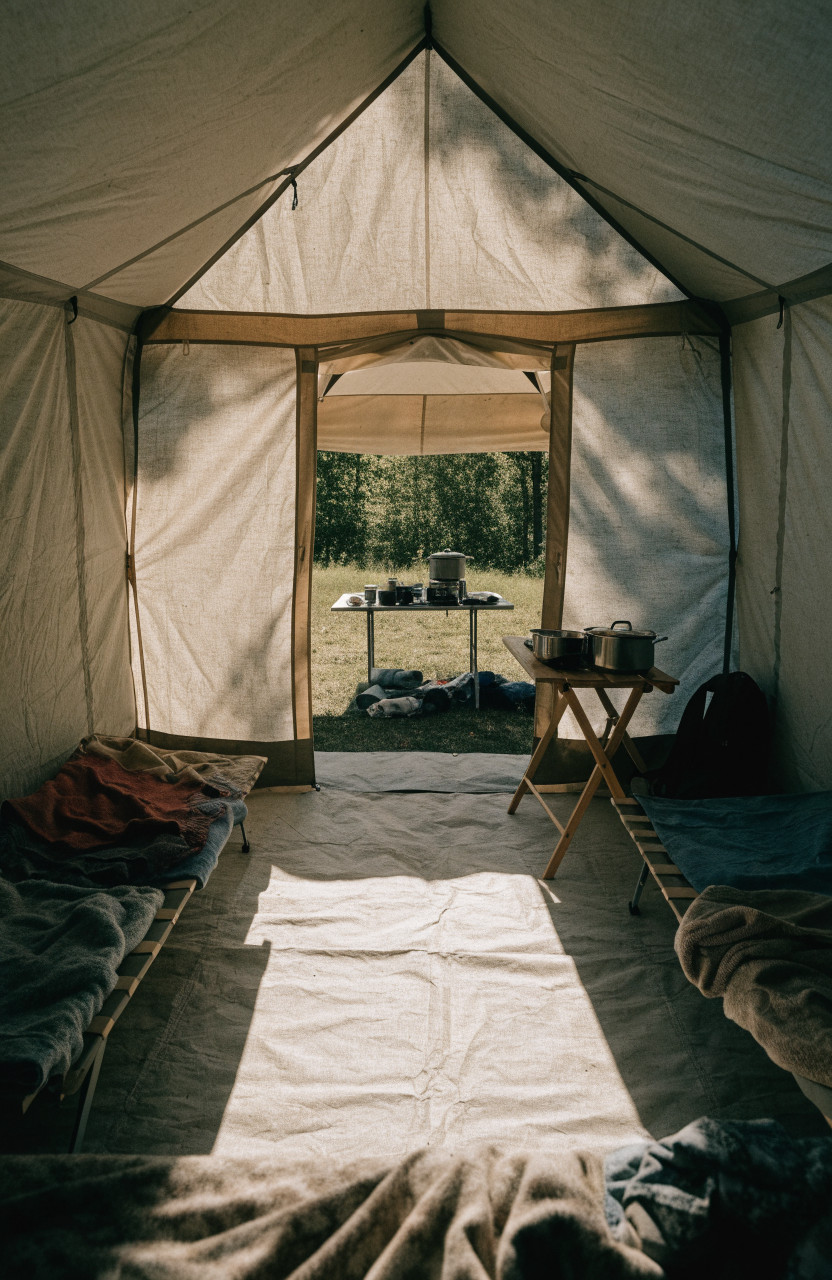
Put sleeping areas along the back and side walls, away from the stove. Keep a clear path to the door. Cooking inside is possible on the stove top, but a simple outside kitchen under an awning keeps grease, steam, and food smells out of sleeping bags.
For multi-night camps, a cot beats a pad on cold ground, and a small table keeps the stove area from becoming a pile of pots. In warm weather, open windows and a rear door; canvas still holds heat, and a closed wall tent in full sun is uncomfortable. In cold weather, the sod cloth seal and a dry floor matter more than extra blankets.
Follow Leave No Trace on a larger footprint. Use an established site when you can, pack out waste, and keep fires in the stove or an existing ring rather than scarring new ground. A wall tent left up for days should not become a reason to trench, cut live trees for frames, or expand the pad.
Care that decides whether the tent lasts
Cotton canvas fails in storage more often than in weather. Never pack it wet. If you break camp in rain or heavy dew, pitch it again at home the same day and dry every seam before it goes in the bag. Moisture trapped in a stuff sack can grow mildew in days, even on treated fabric.
Brush off dried mud, rinse with mild soap if needed, and avoid bleach and pressure washers, which strip waterproofing and weaken fibers. Re-treat water repellency when rain starts to soak in rather than bead. Store the dry canvas loosely, off a concrete floor, where air can move. UV shortens life on tents left up for weeks; a fly or a shaded site slows that.
Frequently asked questions
Can one person set up a wall tent? Yes on smaller models, if you use the one-sided frame method and there is little wind. Larger tents are safer and faster with two people.
Do wall tents need a rain fly? Many cotton and synthetic wall tents are designed to shed rain on their own once the fabric is seasoned and taut. A fly still cuts UV and adds a margin in prolonged storms. Check the specific model.
Are wall tents four-season? The shelter can be, if it has a stove jack, a solid frame, and enough stakes for wind and snow load. The limiting factor is usually the stove, the site, and whether the frame is rated for the snow you expect—not the word “four-season” on a label.
Can you cook inside? Yes, on a properly installed tent stove, with clearance, ventilation, and a stable surface. Many camps still cook outside to keep the sleeping area cleaner.
How do you stop condensation? Vent during the day, crack a window when the stove runs, and keep wet clothes out of sleeping bags. Cotton breathes better than a sealed synthetic, but no tent stays dry inside if wet gear and breath have nowhere to go.