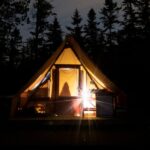
Opaque fabric walls hide you in a tent, but a car is a locked steel shell with glass on every side. Without car camping window covers, that glass lets in streetlights, early sun and passing stares, and it sheds heat quickly on cold nights.
The focus here is closing that gap. The sections cover building friction-fit Reflectix panels, comparing magnetic, mesh-sleeve and custom-fit commercial options, balancing privacy against ventilation, and managing heat, cold and condensation, with storage and stealth tips to finish.
Why Car Camping Window Covers Matter
Glass does almost nothing for privacy. It also lets heat pour in during the day and escape at night. Early sun wakes you up, and headlights from other cars flash across your face. Without covers, sleep tends to stay light and tense.
Covers do three main jobs. First, they stop people from seeing inside. Second, they block light so you can sleep past sunrise. Third, they add a layer of insulation that helps in both heat and cold. Reflective materials bounce sunlight away. The same material traps body heat when the weather turns chilly.
The difference shows up right away. On a cold night, insulated covers slow heat loss so the cabin stays warmer for longer than it would with bare glass. That single change can make a chilly night usable.
Covers are easy to treat as optional. They belong on the basic gear list, right next to a sleeping pad and a headlamp.
How to Make DIY Reflectix Car Camping Window Covers
The cheapest and most customizable option is DIY Reflectix panels. Reflectix is bubble insulation with foil on both sides. A 24-inch by 25-foot roll runs about $30 at most hardware stores or online, and one roll usually covers every window on a compact SUV with some left over.
The steps below cover the full build.
Gather newspaper, packing tape, a permanent marker, scissors, and the Reflectix roll. A yard of black fabric and a can of spray adhesive complete the materials list. Plan on roughly two to three hours for the whole project.
First, make paper patterns. Tape newspaper sheets together until they are bigger than each window. Press the paper into the frame and trace the exact outline with the marker. Label every pattern: driver front, passenger rear, and so on. For matching windows, flip the pattern instead of tracing a second time.
Next, transfer the shapes to the Reflectix. Cut each panel about a quarter-inch larger than the paper pattern. That extra material creates a friction fit. The panel presses into the window channel and stays put without tape or magnets.
Test each piece in the car; a few may need tiny trims. Once the fit feels snug, move to the black side. Spray adhesive on one face of the Reflectix and smooth the black fabric over it. Let everything cure for a full day. The black side faces out for stealth. The shiny side faces in during hot weather to bounce heat away.
Installation is simple. Push each panel into its window. On curved glass, start at the corners and work toward the middle. The panels stay in place even when the doors are opened and closed carefully.
Store the set in a flat plastic bin under the rear seat, where it takes almost no space. After a few seasons the edges may look worn, but the insulation keeps working.
The DIY route gives exact shapes and full blackout. Cardboard works in a pinch but it warps and tears. Foam board is stiffer yet bulkier. Reflectix hits the sweet spot for cost and performance.
Round panel corners slightly and sand Reflectix edges smooth so quarter inch friction fit slides into CRV channels without tearing fabric.
Commercial Car Camping Window Covers Worth Considering
Several ready-made options exist: magnetic shades, sock-style mesh sleeves, and full custom kits.
Test magnets on your door frame with fridge magnet before ordering $15 shades, since Outback style plastic trim rejects them.
Magnetic versions snap onto steel window frames in seconds. A two-pack of basic ones costs around $15 to $20. They give decent privacy and some light control. The catch is that many modern cars use plastic trim. Magnets refuse to stick on those frames, so check your door frames before buying.
Sock-style mesh sleeves slide over the entire door. You open the door, stretch the sleeve on, and close it. Windows can stay rolled down for airflow. These run $20 to $40 for a pair. They excel at bug protection and ventilation. Privacy is only partial, though. At night with an interior light on, shapes still show through. They help in humid weather, but solid covers are still needed for real privacy while sleeping.
Custom-fit kits from brands like WeatherTech cost more. A full vehicle set often lands between $180 and $220. They press into the frames like DIY Reflectix panels and look cleaner. The dual-sided design reflects heat in summer and absorbs it in winter. If you camp every weekend and hate measuring windows, the custom route makes sense. For occasional trips the price feels high.
A practical mix is one magnetic pair for quick daytime stops and Reflectix panels for overnight use. That combination covers most situations without spending hundreds.
Privacy Versus Ventilation Tradeoffs
Full blackout panels give total privacy and darkness. They also trap air. On warm nights the cabin gets stuffy fast. Mesh sleeves solve the airflow problem but leave you more visible.
One way to handle the tradeoff is to combine both. Install solid Reflectix on the windshield and rear hatch, the biggest light and sightline leaks. On the side windows, switch to mesh sleeves when temperatures climb above 70 degrees. That setup allows a cross-breeze through cracked windows while still blocking most views from outside.
Running pure mesh on all four doors moves air well and keeps bugs out, but privacy drops: a flashlight beam from outside can still reveal your outline. Keep at least two solid panels ready.
Condensation is a separate issue. You exhale about a liter of moisture every night. Covers do not create the water. They just give it a cold surface to collect on. The fix is simple: crack two windows on opposite corners about an inch each. The covers still hide you while air exchanges. A small USB fan helps on still nights.
Park into wind with opposite corner windows cracked one inch to boost Big Bend style cross breeze without removing windshield Reflectix.
Managing Heat, Cold, and Condensation
Reflective covers shine in temperature extremes. In summer, face the shiny side outward so sunlight bounces off before it heats the cabin. On a hot day, a covered car stays noticeably cooler inside than one with bare glass.
In winter, reverse the panels. Black side out absorbs whatever weak sunlight appears. Shiny side in reflects body heat back toward you. On freezing nights the covers slow the temperature drop, which helps a cold-rated sleeping bag do its job.
Condensation still happens. Wipe the glass in the morning with a microfiber cloth. Leaving a small gap at the top of one panel lets extra moisture escape without sacrificing much privacy. Some people cut tiny holes for fans, though most setups work fine without them.
The key is never sealing the car completely. Covers plus controlled ventilation work better than covers alone.
Cool cabin in shade before installing shiny out panels on 95 degree Arizona afternoons to trap cooler air inside longer.
Storage and Stealth Tips That Stick
Label every panel with a piece of masking tape: driver front, passenger rear, windshield. That ends the nightly scramble. A full set stacks flat in a 12-by-18-inch bin and typically weighs under four pounds.
For stealth, always put the black side out. From twenty feet away the windows look tinted instead of covered. Reflective foil shining back at night draws attention. Black fabric blends better.
Avoid leaving panels in place while driving. They can block mirrors and create glare for other drivers. Installation takes about four minutes once you know the shapes. Removal is even faster.
On multi-day trips, leave the side panels in and remove only the windshield cover when you need full visibility. That saves time at each stop.
Frequently Asked Questions
Do I really need car camping window covers or can I just use blankets? Blankets sag and leave gaps. Light leaks through and privacy fails. Covers cut to the exact shape seal the edges and stay put all night.
How long do DIY Reflectix covers last? Mine are three years old and still functional. The edges fray a little but the insulation holds. Store them flat and they last longer.
Can car camping window covers stop condensation completely? No. They only give moisture a surface to form on. Cracking two windows on diagonal corners moves the air and keeps dripping under control.
Are magnetic shades better than friction-fit panels? Only if your window frames are steel. Plastic trim defeats magnets. Friction-fit panels work on almost any car and cost less to make.
What about the windshield specifically? It is the largest glass surface and the one most people look through. A solid custom or DIY panel there does more for privacy and blackout than any other single cover.
A Reflectix set can live in the car year-round. With streetlights and passing faces shut out, the cabin stays quiet and dark well past sunrise. Changing vehicles just means tracing a fresh set. Try the DIY route on your next free afternoon.