
A roof top tent camping setup is two jobs, not one. The mount is a one-time installation that has to stay put at highway speed. The campsite routine is a short sequence you repeat every night: park level, open the tent, set the ladder, tension the fabric, and only then climb in. Most first-trip problems come from mixing those jobs up — treating a light cargo bar as a tent mount, or treating a steep ladder and a tilted mattress as “fine for one night.”
Get the vehicle side right before you leave home. Get the camp side into a fixed order so a late arrival in the dark does not become an experiment.
Confirm the Vehicle Can Carry the Tent While Moving
The number that decides whether a roof top tent camping setup is safe is the dynamic roof load: the weight the roof and rack can carry while the vehicle is moving, including bumps, braking, cornering, and wind. The static load is what the system can support when parked, with people in the tent. Static capacity is higher, and sleepers only count against it. It does not raise the driving limit.
Four limits can apply at once, and the lowest one wins:
- The vehicle’s dynamic roof rating, from the owner’s manual for that exact model and roof.
- The rack or crossbar dynamic rating.
- The tent’s own mounting and occupancy ratings.
- Anything else on the same roof: awning, light bar, traction boards, storage box, mounting hardware.
Add the closed tent, the bars and feet, and the hardware. Bedding left inside a hard shell while driving counts too. A setup that is “allowed” at 95–100 percent of the dynamic rating can still feel loose, noisy, and unpleasant. Leave margin.
Do not invent a static multiplier. Some rack makers discuss rules of thumb such as roughly three times dynamic for their own systems. Vehicle makers often publish only the dynamic figure. If the static number is not published, follow the tent, rack, and vehicle instructions rather than a forum formula.
Clamp-on, clip-style, and door-jamb bars are a hard stop for most rooftop tents. Thule, Yakima, and Rhino-Rack advise against mounting a rooftop tent to systems that clamp into the door frame, because those clamps are not designed to stay fixed under tent loads and movement. Yakima’s SkyRise guidance also says not to use its clamp-type towers, and not to use most factory crossbars, which it describes as too flexible. Raised rails, fixed points, tracks, or gutters are the usual starting point — then verify the actual ratings and the approved fit for your vehicle.
Match the Rack to the Tent, Not the Other Way Around
Factory rails alone are not a mount. You need crossbars or a platform the tent can clamp to, rated for the closed tent plus hardware.
Aftermarket crossbars from makers such as Yakima, Thule, or Rhino-Rack are the common solution on SUVs and crossovers, provided the dynamic rating covers the tent. Full platform racks spread the load and are the usual choice for heavier hard shells. Truck bed racks often have much higher dynamic ratings than a passenger-car roof.
Spacing matters as much as the weight number. Many tents want the bars roughly 30 to 40 inches apart, center to center, and parallel. A spread that is too narrow increases flex and stress on the mounting tracks. Fixed factory bars that cannot move, or bars that are strongly arched, often will not meet the tent maker’s minimum spread or give the clamps a flat seat.
Before you tighten anything, open the tent on the ground or do a test deploy after a temporary placement. A rear-opening tent can block a hatch. A side-opening tent needs ladder clearance beside the vehicle. Confirm doors, handles, and the rear glass still work with the tent closed and open.
Mount the Tent Once, Then Stop Adjusting It on the Road
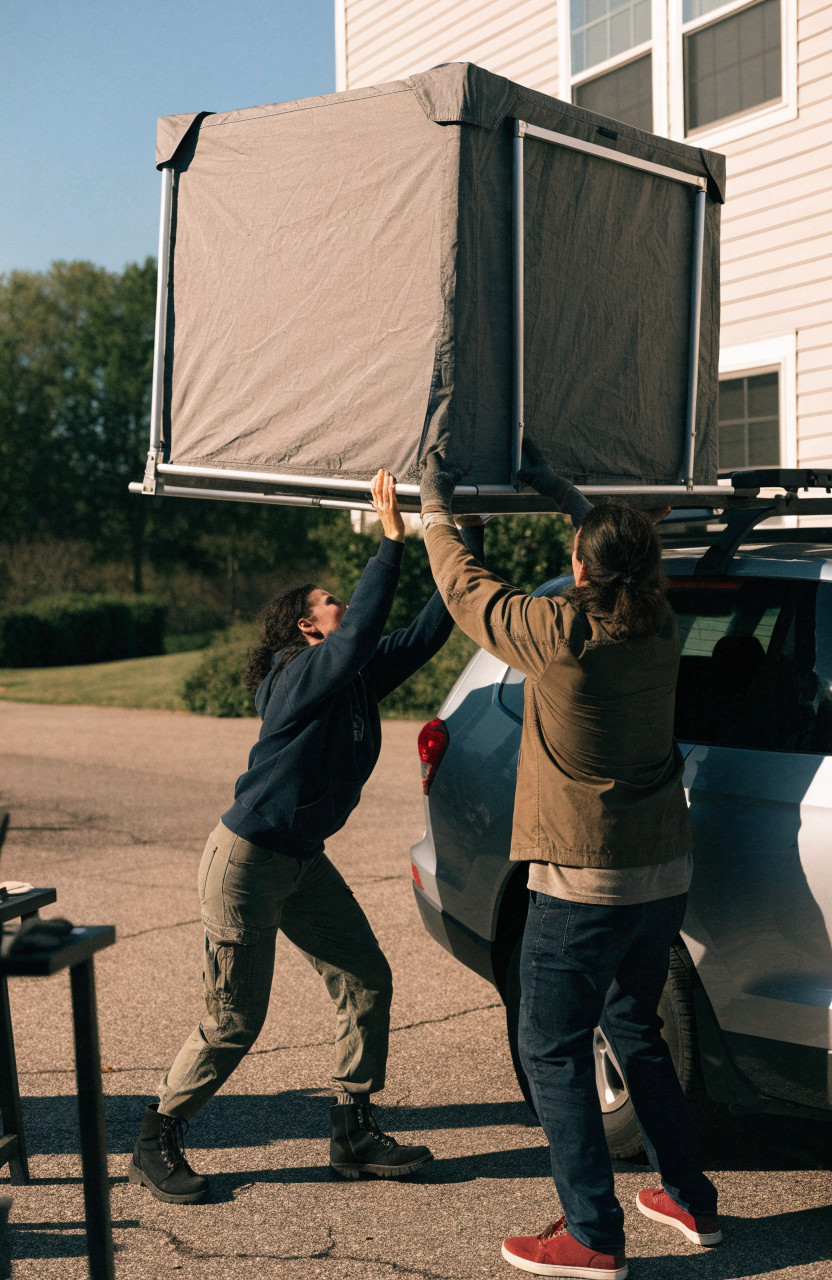
Closed rooftop tents commonly weigh about 100 to 200 pounds. Lift with at least one other person, from the base frame, not from fabric, the mattress, or the travel cover. Workstands or a low platform make the lift safer than a dead hoist from the ground.
- Assemble hardware on the ground and read the torque values in the tent manual. Typical base-bolt figures land around 17–26 ft-lb when a maker does not publish its own number, but the manual overrides any general range. Use a torque wrench.
- Set crossbar spread inside the tent’s minimum and maximum. Mark the lateral center of the bars.
- Slide channel bolts or T-nuts into the tent tracks before the lift if the design requires it.
- Lower the tent onto the bars, center it side to side, and set the front-to-back position the maker specifies. Some want the mass slightly rearward of the front third of the bars; others simply want even overhang. Follow that sheet, not a generic rule.
- Fit the clamps or brackets under the bars. Tighten in a crisscross pattern in stages so the base does not twist. Some brackets are meant to take a slight bend as they clamp; that is normal only if the manual says so.
- Use medium-strength threadlocker if the maker calls for it. Do not add it to parts that must stay adjustable.
- Deploy the tent fully, check hatch and door clearance, then close it and re-torque.
- After the first drive of 30–50 miles, and again after the first rough road, recheck every mount. Under-torqued clamps walk. Over-torqued bolts can crush thin tubing or strip tracks.
The tent stays mounted between trips for most people. Removing a 150-pound shell every week is how hardware gets lost and ladders get bent.
Deploy at Camp in One Order
Nightly setup fails when the ladder goes down before the vehicle is level, or when fabric is tensioned before the base is stable. Use the same sequence each time.
- Walk the pad before you commit. Look up for branches and lines. A closed tent already adds height; an open hard shell or soft-shell peak needs more. Look down for soft sand, deep ruts, and low spots that pond. Confirm the site allows rooftop tents if you are in a managed campground — some hosts restrict vehicles on grass.
- Park, then level. A bubble level or the vehicle’s incline display is enough. Leveling blocks or recovery boards go under tires, not under the ladder. Side-to-side level matters more for sleep than a small nose-up attitude. Sleep with your head slightly uphill, never downhill.
- Secure the vehicle. Parking brake on, transmission in park or in gear, wheels chocked if the pad slopes. The ladder is not a parking brake.
- Open the tent the way it was designed. Hard shells: release latches, let the struts lift the shell, then extend and lock the ladder. Soft shells: remove the travel cover, unfold the base with the ladder controlling the drop, insert poles, fit the rainfly, then stake what the design calls for. Do not force a stuck hinge. Clear debris from the seal first.
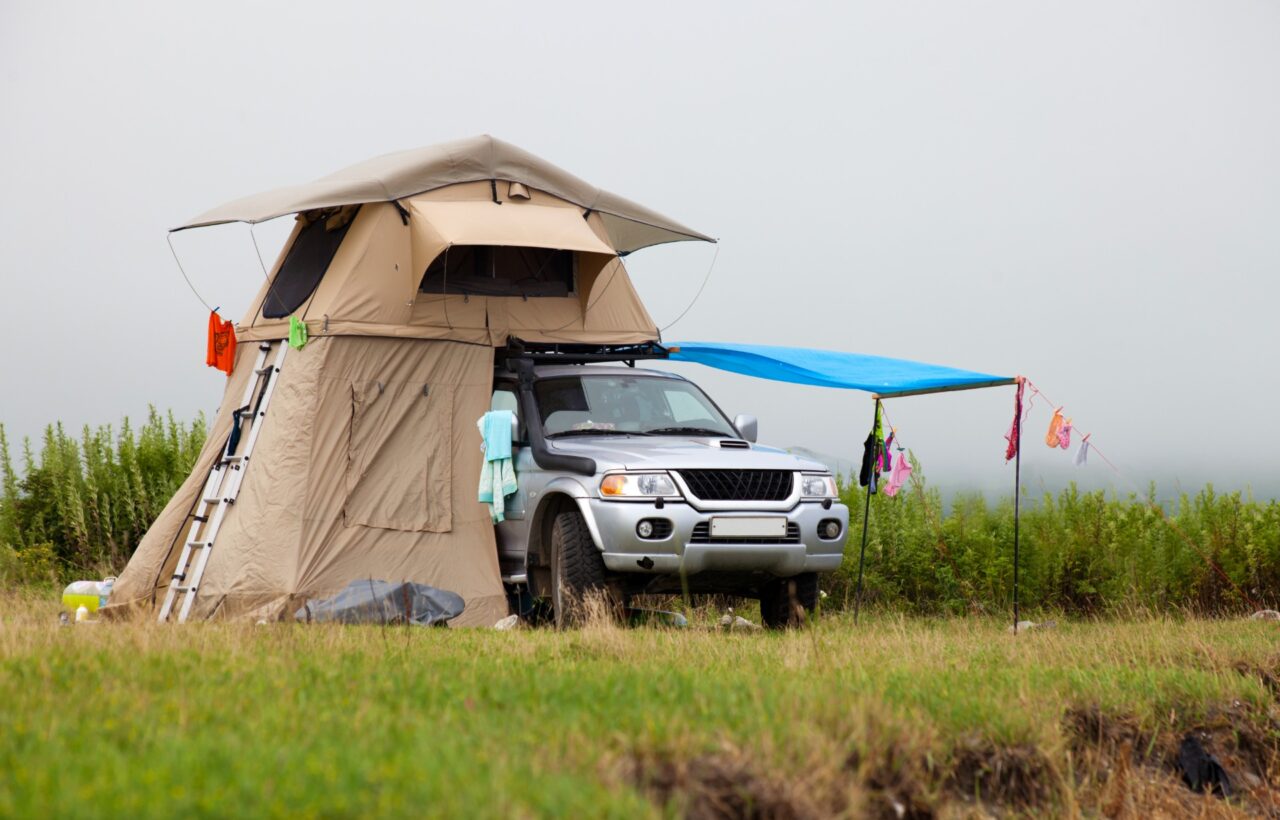
- Set the ladder at a stable angle. Feet on firm, flat ground — a board under the feet if the landing is rock or loose soil. You should not be standing on the top rungs to get in. If the ladder is too short for a lifted truck, the fix is a longer ladder or a lower mount, not a steeper climb. Position the ladder on the uphill side when the pad is not flat.
- Tension, then add wind gear. Soft-shell fabric should be taut, not drum-tight. Guy lines, when the tent has them, run out at roughly 45 degrees and stake at an angle back toward the tent. An annex or awning goes on last. In wind, an annex is a sail; leave it off or drop it if gusts rise.
- Shake test. From the ladder and from a corner, push the tent. Movement should be small and should stop when you stop pushing. If a clamp clicks or the base walks, get down and tighten before anyone sleeps in it.
With practice, a hard shell is often open in one to three minutes. A soft shell more often takes five to fifteen, plus the reverse time to fold the fabric so the cover actually zips.
Pick the Site for the Vehicle, Not Just the View
The tent is off the ground. The failure mode is usually the vehicle or the ladder landing.
Overhead clearance is the first filter. Low limbs tear covers on the way in and can drop onto an open shell. Dead branches — “widowmakers” — are a reason to move, not a reason to hope the wind stays down.
Level dirt or compacted gravel is easier than a scenic side slope. Blocks can fix a few inches. They cannot fix a pad where one wheel is in a hole and the ladder lands on a boulder. If you need a shovel to cut a flat spot for the ladder feet, do that before you open the tent.
Wind exposure matters more than a ground tent in one way and less in another. You will not flood from below, but a broad soft-shell face catches gusts, and a high vehicle rocks. Point the narrower end toward the expected wind when the site allows it. Gullies and the lee side of a low ridge are calmer than ridgelines and dune edges.
Soft ground is still a problem. The tent does not sink; the vehicle does, especially after rain, and a stuck truck under an open tent is a bad recovery. Low spots that look dry at sunset can hold water by morning.
Highway-adjacent pads add noise and dust. Dense brush adds fabric snags and, in some regions, insects or snakes at ladder height. None of that shows up in a photo of the view.
Soft-Shell and Hard-Shell Setups Are Different Routines
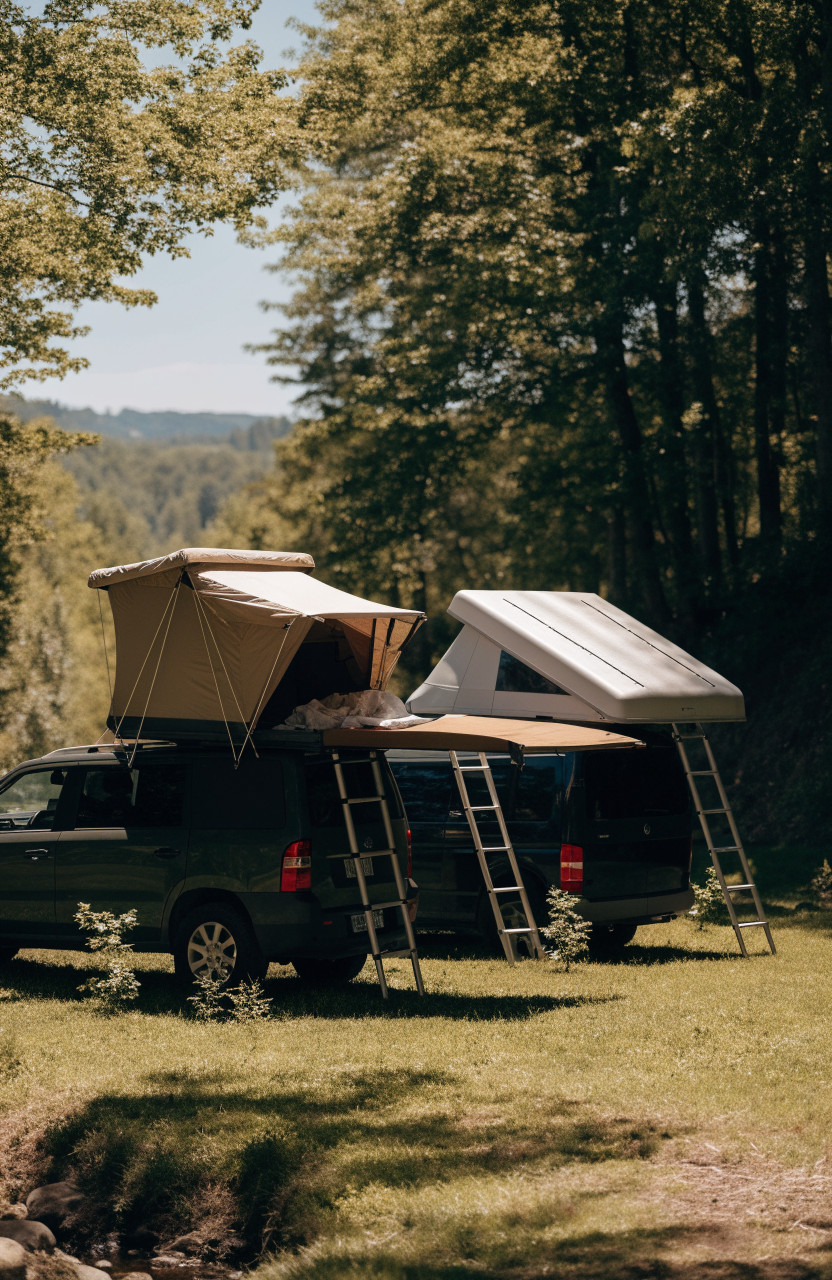
| Soft shell | Hard shell | |
|---|---|---|
| Open sequence | Cover off, unfold, poles, fly, stakes | Latches, struts, ladder |
| Typical open time | About 5–15 minutes | Often 1–3 minutes |
| Close time | Longer; fabric must be folded so the cover seals | Shorter; tuck fabric, latch shell |
| Sleeping area | Often larger for the roof footprint | Usually limited to the shell size |
| Bedding on the road | Usually removed | Often stays inside, and that weight counts on the roof |
| Wind and noise | More fabric flutter and highway noise | Shell is stiffer and usually quieter |
| Annex | Common | Less common |
Choose on the trip style, not the brochure photo. Daily moves and late arrivals favor the hard shell. A base camp with kids and a need for floor space often favors the soft shell, if the vehicle can carry it and you accept the longer pack-up.
What Goes Wrong on the First Roof Tent Trip
Counting only the tent weight. Bars, feet, an awning, and gear inside the shell are part of the dynamic load. The rack rating does not override a lower vehicle rating.
Using the bars that came with a naked-roof fit kit. If the towers clamp into the door jamb, major rack makers say not to hang a tent on them.
Finalizing the mount before opening the tent. Hatch interference and a ladder that lands in the door opening are installation problems, not campsite problems.
Climbing a near-vertical ladder. Too little angle loads the mounts oddly and makes the top rungs the step. Extend the ladder until the feet sit out and the climb feels like a staircase, not a wall.
Leaving the vehicle unleveled because “the mattress is thick.” A few degrees side to side rolls sleepers into the wall all night. Fix it with blocks under the tires.
Staking an annex into rising wind. Guy it or drop it. Fabric attached only to the vehicle becomes a lever on the rack.
Skipping the bolt check. The first highway run and the first corrugated road are when clamps settle. Recheck torque before the second night.
Rain, Wind, and Cold Change the Sequence, Not the Rules
Rain is mostly a packing problem. Open the tent before the cover soaks the mattress, and close it before water sits in folds. Hard shells shed this better. Soft shells need the fly on and the cover fully zipped in the morning so you are not folding standing water into the bag.
Wind is a site problem first. If gusts are already moving the vehicle, a tighter guy line will not fix the pad. Drop annexes, face the narrow end into the wind if you can, and use the cab as the shelter if the tent is thrashing. Sustained strong wind is a reason to sleep inside the vehicle, not a reason to add more stakes.
Cold is a condensation problem. Body moisture has nowhere to go in a sealed shell. Crack a vent even when the outside temperature is low. A sleeping bag rated for the night, used on top of the tent mattress rather than instead of insulation under you, matters more than another blanket on top. Do not run a camp stove or any flame inside the tent. Carbon monoxide and fabric do not belong in the same small space.
What to Keep in the Vehicle for Setup
A short list covers almost every pad: leveling blocks, a small level, wheel chocks, a mallet and stakes matched to the soil, a board for ladder feet, a headlamp, and the torque wrench if this is the shakedown trip. A shoe bag at the ladder keeps mud out of the tent. None of this replaces the mount check at home.
Frequently Asked Questions
Does my weight count against the dynamic roof load? No. Nobody rides in the tent. Dynamic load is the closed tent, rack, hardware, and anything else on the roof while driving. Your weight counts against the static or sleeping capacity once parked.
Can I mount a rooftop tent on factory crossbars? Sometimes, if those bars are rated for the total dynamic load and the tent maker allows them. Often they are not. Yakima’s own tent guidance says not to use factory crossbars because they flex. Check the bar rating and the tent manual, not the fact that the vehicle “has a rack.”
How level does the vehicle need to be? Level enough that you do not roll into the wall and that the ladder feet sit flat. A phone level or a short bubble level on the floor of the tent is enough. Chase side-to-side first.
Do I have to take the tent off between trips? No. Most people leave it mounted. Recheck mounts after the first drives and periodically after that. Remove it if you need the roof clear, if the vehicle will sit unused for a long stretch in severe weather, or if a garage door will not clear the closed shell.
What if the ladder does not reach comfortably? Do not climb the top rungs. Use a longer ladder rated for the entrance height, or lower the tent on a rack that still meets the load rating. A door step helps entry to the cab on a tall vehicle; it is not a substitute for a stable tent ladder.