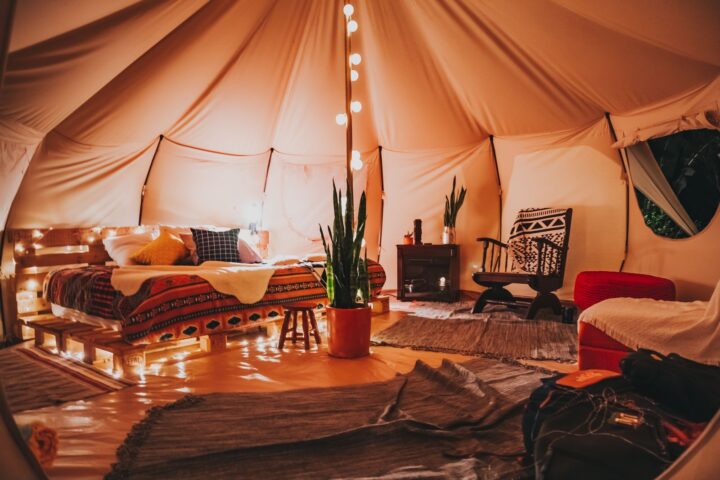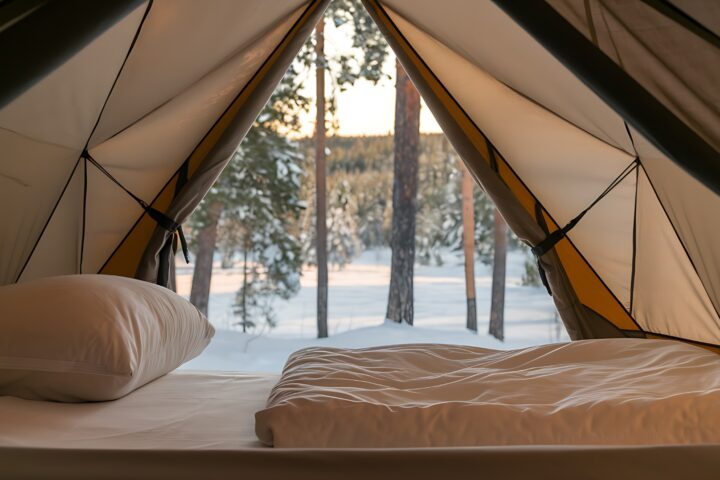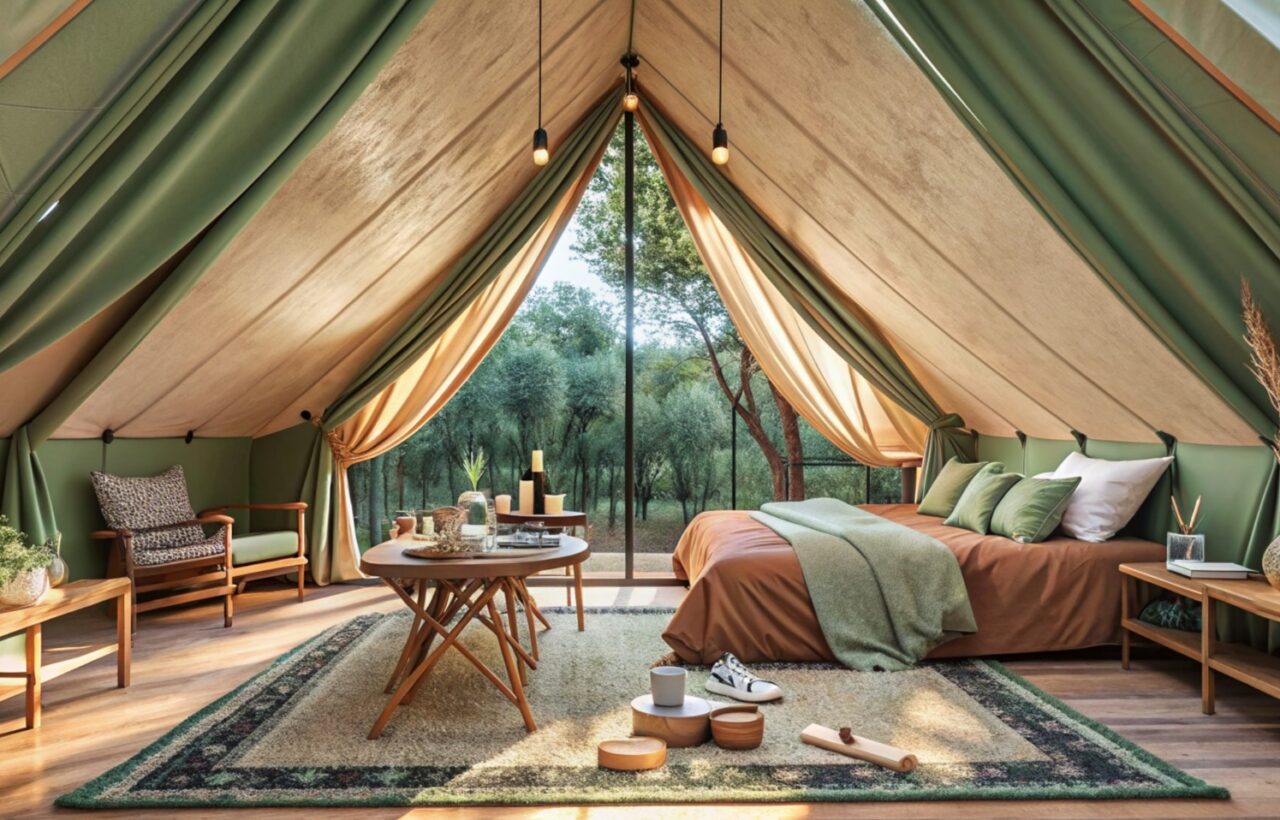
Bare floors, a bed on the ground, and one harsh light hanging from the peak leave a glamping tent looking unfinished. It also fails when it is stuffed like a hotel suite. Sloped walls, a center pole, condensation, and limited power change what actually works.
The most useful interiors start with sleep, then warmth underfoot, then lighting, then one clear place to sit. Decor comes last. The 21 ideas below are organized that way so you can build a comfortable space without crowding it.
Why glamping interiors need different rules than a bedroom
Bell tents, safari tents, and many canvas lodges share three limits:
- Walls slope. Tall dressers, high headboards, and bulky sofas waste the only space where you can stand upright.
- The floor is part of the climate system. Ground moisture and night-time condensation collect under rugs, mattresses, and solid mats.
- Power and heat are limited. Lighting and climate control have to work from batteries, solar, a safe vented stove, or a small hookup.
A 13-foot bell tent is a couple’s room. A 16-foot tent can hold a bed plus a small lounge. A 20-foot tent can feel like a suite. Match the furniture to the diameter instead of copying a Pinterest photo taken in a much larger lodge.
Sleep first: the bed is the whole room
1. Put a real mattress on a low, raised frame
An air mattress can work for a weekend. For anything longer, a proper mattress on a low platform or bed frame is the single biggest upgrade. Raising the bed does two jobs: it keeps sleepers off cold ground, and it creates luggage space underneath.
Keep the frame low. In a bell tent, ceiling height drops quickly toward the walls. A tall hotel bed makes the room feel smaller and forces you to duck when you sit up.
A queen bed fits a 13-foot tent if you keep nightstands small. A king usually needs a 16-foot or 20-foot tent if you also want walking space.
2. Layer bedding by season instead of buying one “luxury” set
Canvas interiors swing hotter and colder than houses. Lightweight cotton or linen in summer, flannel sheets and a heavier duvet or wool blanket in spring and fall. Extra throws belong at the foot of the bed, not in a pile on every chair.
Washable covers matter more than thread-count marketing. Dust, pine needles, and damp air get into fabric quickly.
3. Use two small nightstands, not one large dresser
Each side of the bed needs a landing spot for a lantern, phone, water, and glasses. Stacked crates, low stools, or compact wooden nightstands work. Full dressers rarely do. Guests stay a night or two; they do not need drawers for a wardrobe.
4. Skip a tall headboard
A tall headboard fights the sloped wall and blocks airflow behind the bed. If you want a finished look, use a low upholstered panel, a folded quilt, or nothing. The canvas itself is the backdrop.
5. Treat under-bed space as the luggage zone
Open floor space disappears the moment suitcases land beside the bed. Slide bags, spare blankets, and shoes under the frame in baskets or low bins. That one habit keeps the room looking intentional.
Floors and layout: warmth without trapping moisture
6. Build the floor in layers
Bare PVC or canvas floors feel cold and unfinished. A better stack is:
- A proper footprint or groundsheet
- A breathable indoor-outdoor rug or washable wool-blend rug
- A smaller accent rug only if the first layer already covers the walking path
Avoid thick rubber mats or sealed plastic rugs that trap moisture against the floor. In humid sites, that is how mildew starts under furniture.
7. Use rugs to mark zones, not to carpet every inch
In a circular tent, one large rug under the bed and a second smaller rug in the lounge area is enough. Wall-to-wall coverage looks finished in photos and becomes a cleaning problem after rain.
Leave a strip of floor visible near the door so wet shoes never step straight onto the nicest textile.
8. Create a shoe-off landing at the entrance
An outdoor-rated mat just inside the door, plus a small bench, stool, or crate for shoes, stops most dirt before it reaches the bed. If the tent has a vestibule or porch, keep the messiest items there.
This is especially useful for rental setups. Guests will not remember to be careful unless the entry tells them what to do.
9. Leave a walking path around the center pole
In a classic bell tent the pole is not decoration. It is structure. Do not push the bed so close that people clip the pole in the dark. Place the bed opposite the door when you can, so the first view is the made bed, not a pile of bags.
If the tent has no center pole, a centered bed can look balanced. If it has one, offset the bed and keep circulation around the pole.
Lighting that makes canvas feel like a room
10. Aim for warm light at several heights
Brightness is not the goal. Warmth is. One flood light at the peak flattens the space and feels like a worksite.
A simple working mix:
- Soft overhead string lights
- A lantern or lamp on each nightstand
- One extra light near the seating area
Warm-white LEDs (around 2700K) look closer to candlelight than cool-white bulbs.
11. Run string lights along the ceiling line or around the pole
This is the fastest way to make a tent photograph well and feel finished at night. Follow the interior seam, wrap the center pole, or spiral from the peak downward. Secure cords so they cannot snag when someone stands up.
Solar or battery strings are easier than running an extension cord across a damp floor.
12. Give the bed its own reading light
Overhead sparkle is not enough when someone wants to read without waking a partner. Clip-on lights, small battery lanterns, or compact lamps on the nightstands handle that job.
13. Keep open flame off the furniture plan
Real candles look romantic and create a fire and soot problem next to canvas. Use LED lanterns or flameless candles if you want flicker. If you add any fuel-burning heat source, that is a safety system, not a styling prop. It needs a stove jack or an indoor-rated heater, ventilation, and a carbon monoxide alarm. Never treat a patio heater or charcoal grill as interior lighting.
Furniture that earns its footprint
14. Add one real place to sit that is not the bed
A glamping tent without seating forces every conversation onto the mattress. One compact armchair, two folding camp chairs with decent cushions, or a pair of floor poufs is enough in a small tent. A full sofa belongs only in larger safari tents and lodges.
If the piece cannot be used with the door closed on a rainy afternoon, it is the wrong size.
15. Store up, not out
Poles, wall loops, and hanging organizers hold robes, hats, lights, and chargers without eating floor space. A standing coat rack works in a safari tent with vertical walls. In a bell tent, hanging storage is usually cleaner.
Leave bulky plastic tubs outside or under the bed. Visible plastic storage makes the interior feel like a campsite, not a room.
16. Use a small covered table instead of a dining set
Most people need a surface for coffee, a book, and a charging cable. A lightweight folding table with a cloth looks better than an empty metal top and packs down when you need floor space. A full dining table inside a 13-foot tent usually crowds the bed.
Cook and eat outside when weather allows. Indoor kitchens belong in larger, purpose-built glamping units with ventilation.
17. Add one mirror where it can bounce light
A full-length or large leaning mirror near the entrance does more than help with getting dressed. It reflects daylight and evening lights, which makes a small tent feel less cave-like. Keep it low and stable so sloped walls and uneven ground cannot tip it.
Climate, privacy, and materials
18. Solve ventilation before you add heat or cooling
Condensation is normal in a closed tent at night. People, wet clothes, and cooking all add moisture. Open high vents and at least one lower opening so humid air can leave. A taut pitch also helps; sagging fabric collects drips.
Portable fans help in still, hot weather. Dehumidifiers or moisture absorbers help in damp climates if you have power. Heating a sealed tent to “dry it out” without airflow often makes surfaces wetter.
19. Choose materials that can get damp and still look decent
Good interior materials for canvas spaces:
- Wood, rattan, and metal that can be wiped
- Washable outdoor rugs
- Linen, cotton, and wool textiles
- Closed-bin storage for paper and cardboard
Risky materials:
- Untreated particleboard furniture
- Thick indoor carpets
- Anything that must stay bone-dry to look finished
If the tent is a rental, every textile should be removable and washable between stays.
20. Add privacy without sealing the tent
Canvas glows at night. If the site has neighbors, use interior curtains, a lightweight drape near the bed, or external privacy screens rather than covering every window. You still need airflow.
A dark-colored throw over a bright window panel at bedtime is a simple fix in tents that let in too much dawn light.
21. Stop at a short list of natural details
Plants, a small vase, a wooden tray, a stack of books, and one textured throw are enough. Fake ficus trees, dreamcatchers, tapestries on every wall, and a mixed “boho plus ski lodge plus rainbow” theme cancel each other out.
Pick one palette and stay there: sand, cream, olive, rust, and wood tones sit naturally against canvas. High-contrast neon and heavy black furniture fight the tent instead of finishing it.
Interior ideas by tent size
| Tent size | What fits comfortably | What usually overcrowds it |
|---|---|---|
| About 13 ft / 4 m | Queen bed, two small nightstands, one chair, one rug | King bed, sofa, dining table |
| About 16 ft / 5 m | Queen or king, nightstands, two seats, luggage bench | Full dresser plus large coffee table |
| About 20 ft / 6 m | King bed, sitting area, mirror, extra storage | Multiple bulky storage units |
| Safari / lodge with vertical walls | Wardrobe rail, taller lamps, defined lounge | Furniture that blocks door swing or stove clearance |
If you are furnishing a rental, photograph the empty floor first. If a piece blocks the path from door to bed, leave it out.
Styling choices that cost comfort or safety
- Filling the floor so no one can change clothes standing up
- Using only cool-white utility lighting
- Putting the bed on the ground “to save space”
- Hanging heavy decor from points that are not rated for weight
- Blocking vents with tapestries
- Mixing indoor upholstery with a damp site and no way to dry it
- Treating a wood stove or propane heater as ambient decor
A good test: can two people move from door to bed in the dark without stepping on a lantern cord or hitting the pole?
Frequently asked questions
Do I need a real bed frame, or is a thick air mattress enough?
For one or two nights, a quality air mattress or cot with a thick topper can be comfortable. For regular use or guest rentals, a real mattress on a raised frame is more reliable. Air mattresses lose pressure in the cold and put sleepers closer to ground chill.
What size tent do I need for a queen bed and a sitting area?
A 13-foot tent can hold a queen bed and a single chair if nightstands stay small. A 16-foot tent is the more realistic size for a queen or king plus a small lounge.
Are rugs safe on a tent floor?
Yes, if they are washable and breathable and you are not sealing moisture underneath. Shake them out, lift them after wet weather, and do not cover the entire floor with a waterproof mat that cannot dry.
How do I make a small glamping tent feel larger?
Keep furniture low, use a light rug, add a mirror, limit the color palette, and leave a clear path. Dark, bulky pieces and wall-to-wall decor shrink the space faster than a smaller bed does.
Can I put a wood stove or heater inside?
Only in a tent designed for it, with the right jack or an indoor-rated heater, required clearances, open vents, and a working carbon monoxide alarm. Unvented fuel appliances and open flames do not belong in a styled interior.
What should I buy first if I am starting from an empty tent?
Buy in this order: mattress and low frame, bedding, layered lighting, a rug, two small surfaces beside the bed, then one seat. Decor after that. Most disappointing interiors skip the first four and start with string lights and pillows.